For several years now, the Twitter editing community have been doing #TimelineTuesday - in which you screengrab the timeline of the project you're currently working on, and share it with the other editors. To us, it's an interesting look at the way other people set up their timelines, and some pretty big editors have joined in in the past, sharing various reels of major feature films with varying degrees of VFX and sound work.
I appear to be one of the few people sharing animation timelines, and they're quite different to what most other people are used to seeing. Indeed, they're quite different to my own live-action timelines (a comparison briefly discussed as part of Avid's own #TimelineTuesday series).
So, I'm going to show how I get there. What the various stages are, and a brief explanation where possible of what's changed and why. A previous blog post has a flow chart which shows the 'typical' route through the edit of an episode, for reference to how each part sits in the whole.
I'm using an episode from the series I'm currently editing as an example, and this post covers the animatic stage of production (for additional information see "editing an animatic", a previous blog post based on a different series). For animatics, I use Adobe's Premiere Pro.
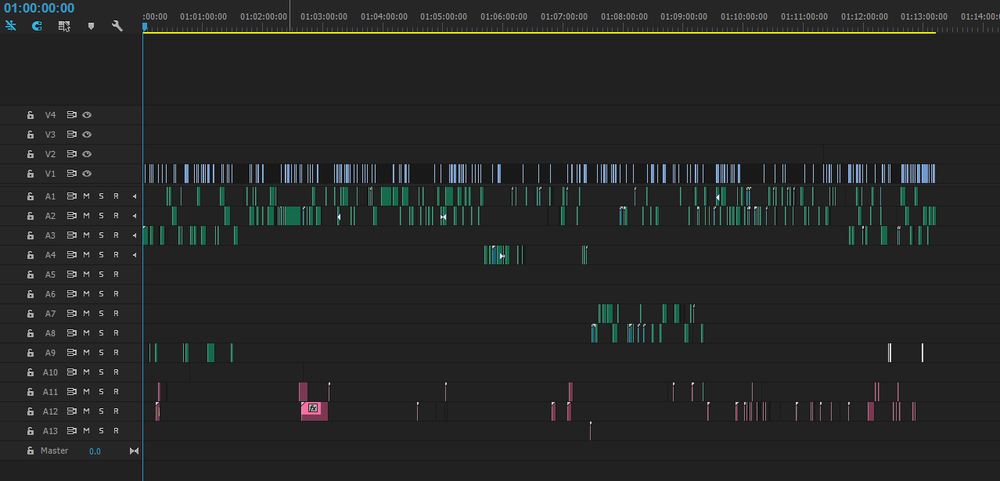
Speech is organised by character, one per track. We have a standard order/ track designation for each of the 10 characters that we deal with in this series, and then remove the unused tracks as we see which aren't needed. But the track for our fairy should always be below the dragon and squirrel, and above the goblin.
Colour coding:
Video Iris (blue) = storyboard panels
Audio Rose = temp sfx. These are added from various libraries on our network, and usually replaced entirely by the sound post-production once the episode is locked.
For this episode I sent the animatic to the series and episode directors at quite an early stage, as I had a lot of questions and things that I wanted to verify before removing sections. Making sure that everyone is trying to tell the same story is an important (and useful) part of the editing job, and in animation there can be a lot of potential for looking at the same thing and seeing something completely different, especially at animatic stage.

Additional colour coding:
Video Mango (orange) = effects - adjustment layers, texts containing notes, etc.

Additional colour coding:
Video Forest (light green) = new storyboards
When exporting for animation, the first stage is to number every shot in the lower left corner - that's the new video layer (V5) on the timeline. I like to alternate the colour of the labels, so that I can see where the scene breaks are (depending on the episode, I'll sometimes colour the boards themselves to show separate storylines - but even then the scene breaks in the numbering are helpful once the storylines converge) . Colour coding the scenes is handy for updating the animation, but also to get an overview of the structure of the episode. The structure of the shots within the scenes also come out clearly - with some action-heavy sequences or moments often denoted by longer shot durations. You may also note that the duration of any given set of storyboards isn't necessarily linked to the overall shot duration - action may be played out across the same shot, or across multiple different shots using different framing to give the energy - it all depends on the context of the story at that time, and the amount of movement or nuance required to convey meaning. This is just one reason why editing continues throughout animation - the amount of movement and energy and information within any moment is constantly changing, and the way an audience will react changes correspondingly.
A1, my '5minsilence.wav', is a Premiere-related quirk... when exporting a .wav for the animators (they take it into their animation software and set a start time and duration for each shot from the .xml metadata provided), points in the timeline without any audio can sometimes result in a nasty electronic noise 'filler'. Putting in a recording of some 'studio silence' helps to eliminate that.
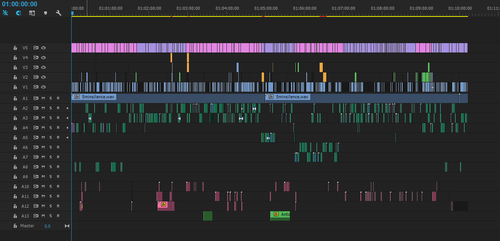
Video Lavender (pink) = shot numbers for odd-numbered scenes (text burn-in)
-
Next: the stages of the timeline through animation